

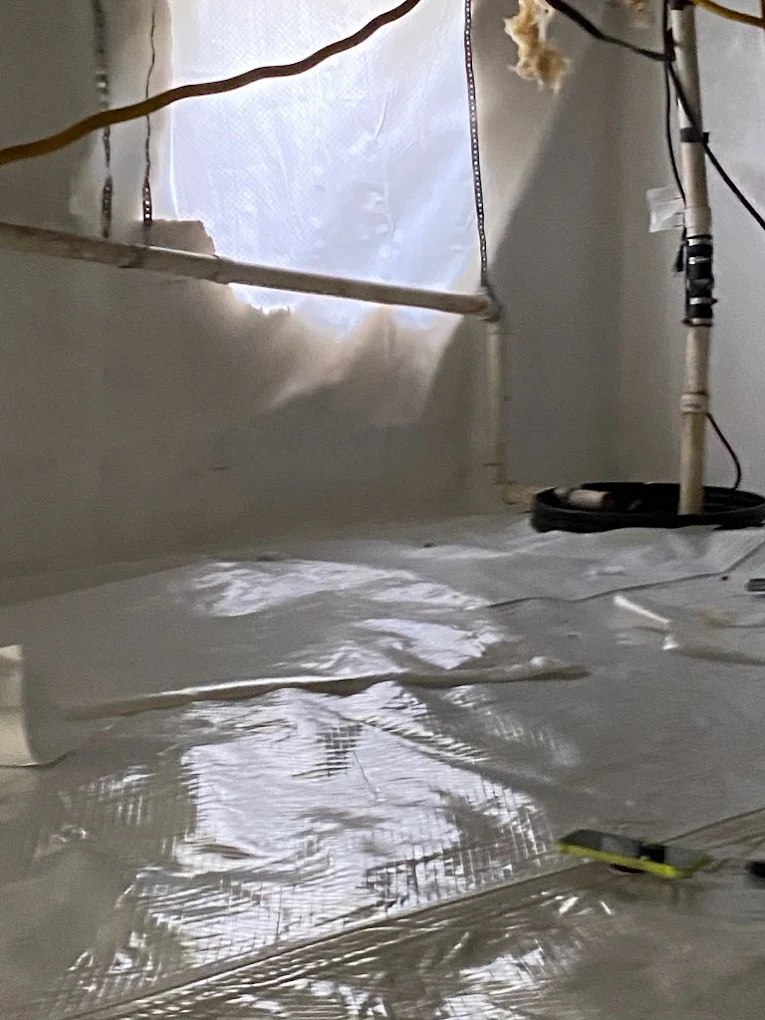
If your home has a crawl space, there’s a good chance it’s quietly working against you.

Damp soil, humid air seeping through foundation vents, wood joists slowly softening: it all happens out of sight, which is exactly why so many homeowners ignore it until the damage becomes impossible to ignore.

Crawl space encapsulation is the solution, and it’s far more than just rolling out a sheet of plastic. It’s a complete, coordinated system designed to seal moisture out, keep your structure dry, and protect everything above it.

If you’re weighing your options for crawl space encapsulation in Southeastern Michigan, knowing exactly what should be included helps you evaluate any quote you receive.

Here’s exactly what’s included, and why each piece matters.

Pre-Encapsulation Inspection and Preparation

Before any material goes in, a proper encapsulation starts with a thorough inspection of the existing crawl space conditions.

This step identifies standing water, active mold, wood rot, pest damage, and drainage problems, all of which must be addressed before sealing anything.

Skipping this step is one of the most costly mistakes homeowners make: if you seal moisture in, you’ve created a worse problem than the one you started with.

Preparation typically involves:

  • Removing debris, old insulation, and accumulated dirt
  • Treating any existing mold growth
  • Repairing or noting damaged floor joists or beams
  • Checking for loose wiring, plumbing issues, or pest activity
  • Leveling uneven areas of the dirt floor

This stage can add $1,000 to $5,000 to the project if mold remediation or structural repair is needed, but it’s non-negotiable for encapsulation to actually work long-term.

Heavy-Duty Vapor Barrier (The Core Component)

The vapor barrier is the backbone of any crawl space encapsulation system.

This is a thick, reinforced polyethylene liner installed across the entire dirt floor and run up the foundation walls, typically between 12 and 20 mil thick.

Thinner consumer-grade sheeting tears easily and won’t hold up to the occasional foot traffic needed for maintenance access. Professional-grade liners are puncture-resistant and rated for long-term performance.

Key installation details include:

  • Seams overlapped by at least 6 inches and sealed with specialized tape
  • Liner secured to foundation walls with adhesive or mechanical fasteners
  • Careful wrapping and sealing around all penetrations: pipes, posts, columns
  • Full coverage from wall to wall with no gaps or exposed soil

The barrier’s job is to stop water vapor from rising out of the ground soil and entering the crawl space air. Exposed dirt emits significant moisture vapor constantly, and without this barrier, that vapor feeds humidity, mold, and wood decay above it.

Sealing of Foundation Vents and Openings

Traditional vented crawl spaces were built on a flawed assumption: that outdoor air circulation would naturally keep things dry.

In humid climates, the opposite happens. Warm, moist outdoor air enters through foundation vents, hits the cooler surfaces inside, and condenses directly onto wood joists and the vapor barrier. That condensation is exactly what feeds mold and rot.

A complete encapsulation seals all of this off:

  • Foundation vents are permanently closed with airtight vent covers
  • Gaps, cracks, and holes in the foundation walls are sealed
  • Any openings around pipes, wiring conduits, or utility penetrations are caulked and taped
  • Rim joists, the framing members sitting on top of the foundation walls, are sealed and insulated

Sealing these entry points is what separates a true encapsulation from simply laying a tarp on the ground. Without it, humid outdoor air continues entering the space regardless of what’s on the floor.

Homeowners dealing with broader moisture issues in the home, not just the crawl space, may also want to look into basement waterproofing in Metro Detroit as part of a complete moisture control plan.

Insulation of Walls and Rim Joists

Once the space is sealed, insulation is added to the crawl space perimeter walls and rim joists, not typically the subfloor above, as is common in older vented designs.

When a crawl space is being conditioned as part of the home’s thermal envelope, wall insulation is more effective than floor insulation at maintaining stable temperatures and preventing energy loss.

Common insulation options include:

  • Rigid foam board: most popular for crawl space walls due to moisture resistance
  • Spray foam: excellent for sealing rim joists and irregular surfaces simultaneously
  • Fiberglass batts: less ideal in humid environments but used in some applications

The R-value required depends on your climate zone and local building codes. Proper insulation means your heating and cooling systems are no longer fighting cold air drafts or heat loss through an uninsulated crawl space floor, contributing to the 10 to 20% energy savings commonly reported after encapsulation.

Industrial-Grade Dehumidifier

This is the component most often overlooked or cheaped out on, and it’s the one that keeps the entire system working.

Even a perfectly sealed crawl space retains some moisture from internal sources, seasonal humidity fluctuations, and minor vapor migration. Without active humidity control, that residual moisture builds up and eventually creates the same conditions encapsulation was designed to prevent.

A dedicated crawl space dehumidifier:

  • Maintains relative humidity between 45% and 55% year-round (the EPA identifies 55% as the upper limit before mold, dust mites, and wood decay become active risks)
  • Runs continuously, unlike residential units not rated for this use
  • Drains automatically via a condensate line, requiring no manual emptying
  • Is sized for the specific square footage of the crawl space

A residential dehumidifier from a hardware store is not an acceptable substitute. These units aren’t designed for continuous operation in low, confined spaces and will fail prematurely.

Professional-grade units come with warranties typically ranging from 5 to 10 years and require annual maintenance, a filter cleaning and check-up running around $100 to $200 per year.

Interior Drainage System and Sump Pump (When Needed)

Not every crawl space requires drainage work, but if the crawl space has a history of standing water, groundwater intrusion, or soil grading issues that direct water toward the foundation, drainage must be addressed before encapsulation.

Sealing a crawl space with an active water intrusion problem traps that water inside with nowhere to go.

An interior drainage system typically includes:

  • French drain or perimeter drain tile: a perforated pipe installed around the crawl space perimeter that collects groundwater and channels it to a collection point
  • Sump pump basin and pump: collects the water diverted by the drain tile and pumps it away from the foundation to a designated discharge area
  • Battery backup: essential for sump pumps, ensuring they continue functioning during power outages when storms most commonly cause water intrusion

Crawl Space Ninja and other specialists note that many contractors encapsulate without a waterproofing system in place, and that this often violates residential building code in areas where exterior soil elevation exceeds interior crawl space level with evidence of standing water. A reputable contractor will flag this before installation, not after.

Access Door and Inspection Pathway

A properly encapsulated crawl space isn’t a sealed black box you never enter again. It needs periodic inspection: to check the dehumidifier, look for pest activity, verify seam integrity, and assess the condition of wood components.

A complete encapsulation includes:

  • A properly sealed, insulated access door that maintains the air barrier when closed
  • A clear inspection pathway or stepping area (often foam board laid on the vapor barrier) that protects the liner from foot traffic damage
  • A visible inspection gap left at the top of the foundation wall liner, allowing termite inspection without disturbing the encapsulation system

This detail matters for homeowners with termite bonds. Inspectors need to visually assess the foundation wall, and most encapsulation systems are designed with a deliberate reveal at the top for this purpose.

What Crawl Space Encapsulation Is Not

It’s worth being direct about this, because many homeowners are sold partial solutions.

A vapor barrier alone is not encapsulation. A thin poly sheet on the dirt floor slows moisture vapor rising from the soil but does nothing to address humid air entering through vents, moisture in the walls, or humidity levels in the space. It’s a component, not a system.

A dehumidifier alone is not encapsulation. Running a dehumidifier in an open, vented crawl space means it’s working constantly against an unlimited supply of outdoor humid air. It will run itself into the ground and your electric bill up significantly without ever winning.

Insulation alone is not encapsulation. Fiberglass batts installed between floor joists were the old standard, and they absorb moisture, lose R-value, sag, and eventually fall. They do nothing to address humidity or vapor in the space itself.

True encapsulation is a system where every component works together: sealed vapor barrier, closed vents, insulated walls, and active dehumidification. Remove any one part and the whole system underperforms.

How Much Does Crawl Space Encapsulation Cost?

Costs vary based on crawl space size, existing conditions, and which components are required, but here are reliable general ranges:

Component Estimated Cost
Vapor barrier only (basic) $500 – $1,500
Full encapsulation (professional) $3,000 – $15,000
With drainage/sump pump added $8,000 – $20,000
Mold remediation (if needed first) $1,000 – $5,000 additional
DIY materials only $1,500 – $3,000
Annual dehumidifier maintenance $100 – $200/year

Average professional installation typically lands around $5,500 for a standard-sized crawl space without pre-existing water damage.

Homeowners commonly recoup more than 96% of encapsulation costs through energy savings and avoided structural repairs, and the system supports resale value by removing crawl space concerns from home inspection reports.

The Bottom Line

Crawl space encapsulation is one of the most impactful investments a homeowner can make in a home’s long-term health.

It protects floor joists and structural components from rot, prevents mold from spreading into living areas, reduces heating and cooling costs by 10 to 20% annually, and keeps pests from finding a quiet, damp home beneath yours.

The key is understanding that it’s a system, every component earns its place. When done right, with a quality vapor barrier, sealed vents, proper insulation, and a dedicated dehumidifier, an encapsulated crawl space stops being a liability and starts being an asset. When done partially, it creates a false sense of security while problems continue developing unseen.

If your crawl space smells musty, if your floors feel soft in spots, if your energy bills seem higher than they should be, or if you simply haven’t thought about what’s happening beneath your home, it’s worth having a professional inspection. The sooner you address what’s down there, the less it costs to fix it.

FAQs

How long does crawl space encapsulation last?

A professionally installed encapsulation system with a 20 mil reinforced liner, properly sealed seams, and correctly installed mechanical components lasts 20 years or more with minimal maintenance. Liner manufacturers typically offer 25-year product warranties. Dehumidifiers and sump pumps have shorter mechanical lifespans of 7 to 15 years and require periodic replacement within the system lifespan.

Does crawl space encapsulation require a dehumidifier?

Yes in most climates. The liner controls vapor from the ground but does not eliminate all moisture sources. Humid outside air still infiltrates through minor gaps, and the crawl space itself generates some humidity. A properly sized crawl space dehumidifier maintains relative humidity below 55 percent year-round and is considered a required component of a complete encapsulation system.

Can I encapsulate my crawl space myself?

Basic liner installation is technically possible as a DIY project but rarely produces professional-quality results. Seam integrity, wall attachment, penetration sealing, and mechanical system installation require experience and proper materials. Improper seams are the most common failure point in DIY installations. Most system warranties require professional installation and are void on self-installed systems.

Will encapsulation stop water from coming into my crawl space?

Encapsulation controls moisture vapor effectively. For liquid water intrusion from groundwater, surface runoff, or wall seepage, drainage components including a perimeter drain channel and sump pump must be installed alongside the liner. Liner alone will not stop liquid water and should not be installed over active water intrusion without a drainage system in place.

How do I know if my crawl space needs encapsulation?

Signs that encapsulation is needed include musty odors in the home, visible mold on crawl space framing, sagging or soft floors, high indoor humidity or allergy symptoms, pest evidence in the crawl space, fiberglass insulation falling from joist bays, and visible condensation on ducts or pipes in the crawl space. A professional inspection with moisture readings provides a definitive assessment.

Does crawl space encapsulation help with radon?

Encapsulation reduces radon entry by sealing the primary pathway radon uses to enter the home, the soil beneath the crawl space. However, encapsulation alone is not a certified radon mitigation system. If radon levels above 4 pCi/L are detected, a sub-membrane depressurization system installed in conjunction with encapsulation is the correct solution.

How often does an encapsulated crawl space need maintenance?

Annual maintenance is recommended and includes dehumidifier filter cleaning or replacement, sump pump operation testing, condensate line clearing, and liner inspection for tears or separation at seams and wall terminations. Dehumidifier units should be professionally serviced every two to three years. Most contractors offer annual maintenance agreements that cover these tasks.

Will encapsulation increase my home’s value?

Yes. Documented professional encapsulation with a transferable warranty adds measurable value during home sale transactions. Crawl space condition is a standard home inspection category. Homes with encapsulated crawl spaces pass inspection without moisture-related findings that trigger buyer concern, price reduction requests, or transaction delays.

What is the difference between a vapor barrier and encapsulation?

A vapor barrier is a single component, typically a thin sheet of polyethylene laid on the crawl space floor. Encapsulation is a complete system that includes a heavy-duty reinforced liner on the floor and walls, sealed vents, sealed rim joists, a dehumidifier, and drainage components where needed. A vapor barrier alone does not control crawl space humidity to the level required for structural and air quality protection.

How long does crawl space encapsulation installation take?

A standard residential crawl space encapsulation takes one to three days depending on crawl space size, access conditions, existing conditions requiring remediation, and the number of system components being installed. Crawl spaces requiring mold remediation, significant debris removal, or drainage system installation add time to the overall project duration.

Leave a Reply